> ## Documentation Index
> Fetch the complete documentation index at: https://docs.clearcue.ai/llms.txt
> Use this file to discover all available pages before exploring further.
# Quickstart
> Set up Signals, define your Audience, and create Lists to start acting on real buying intent.
# Get started in three steps
Clearcue helps you detect real buying intent by combining signals from multiple data sources, filtering them through AI, and delivering actionable lists of people and companies. Here's how to get up and running.
A **Signal** is a behaviour you want to catch — regardless of where it shows up. For example:
* Someone engaged with a competitor's content
* A company is hiring for a specific role
* A startup recently raised funding
* A leader is expanding into a new market
### What are Data Sources?
Signals are powered by **Data Sources** — the channels Clearcue continuously monitors to find matches. These include social posts, profile engagements, job listings, news articles, podcasts, and more.
You don't need to check each source manually. When you create a signal, Clearcue's AI scans across all relevant data sources, filters out the noise, and surfaces only the matches that matter.
### Create your first Signal
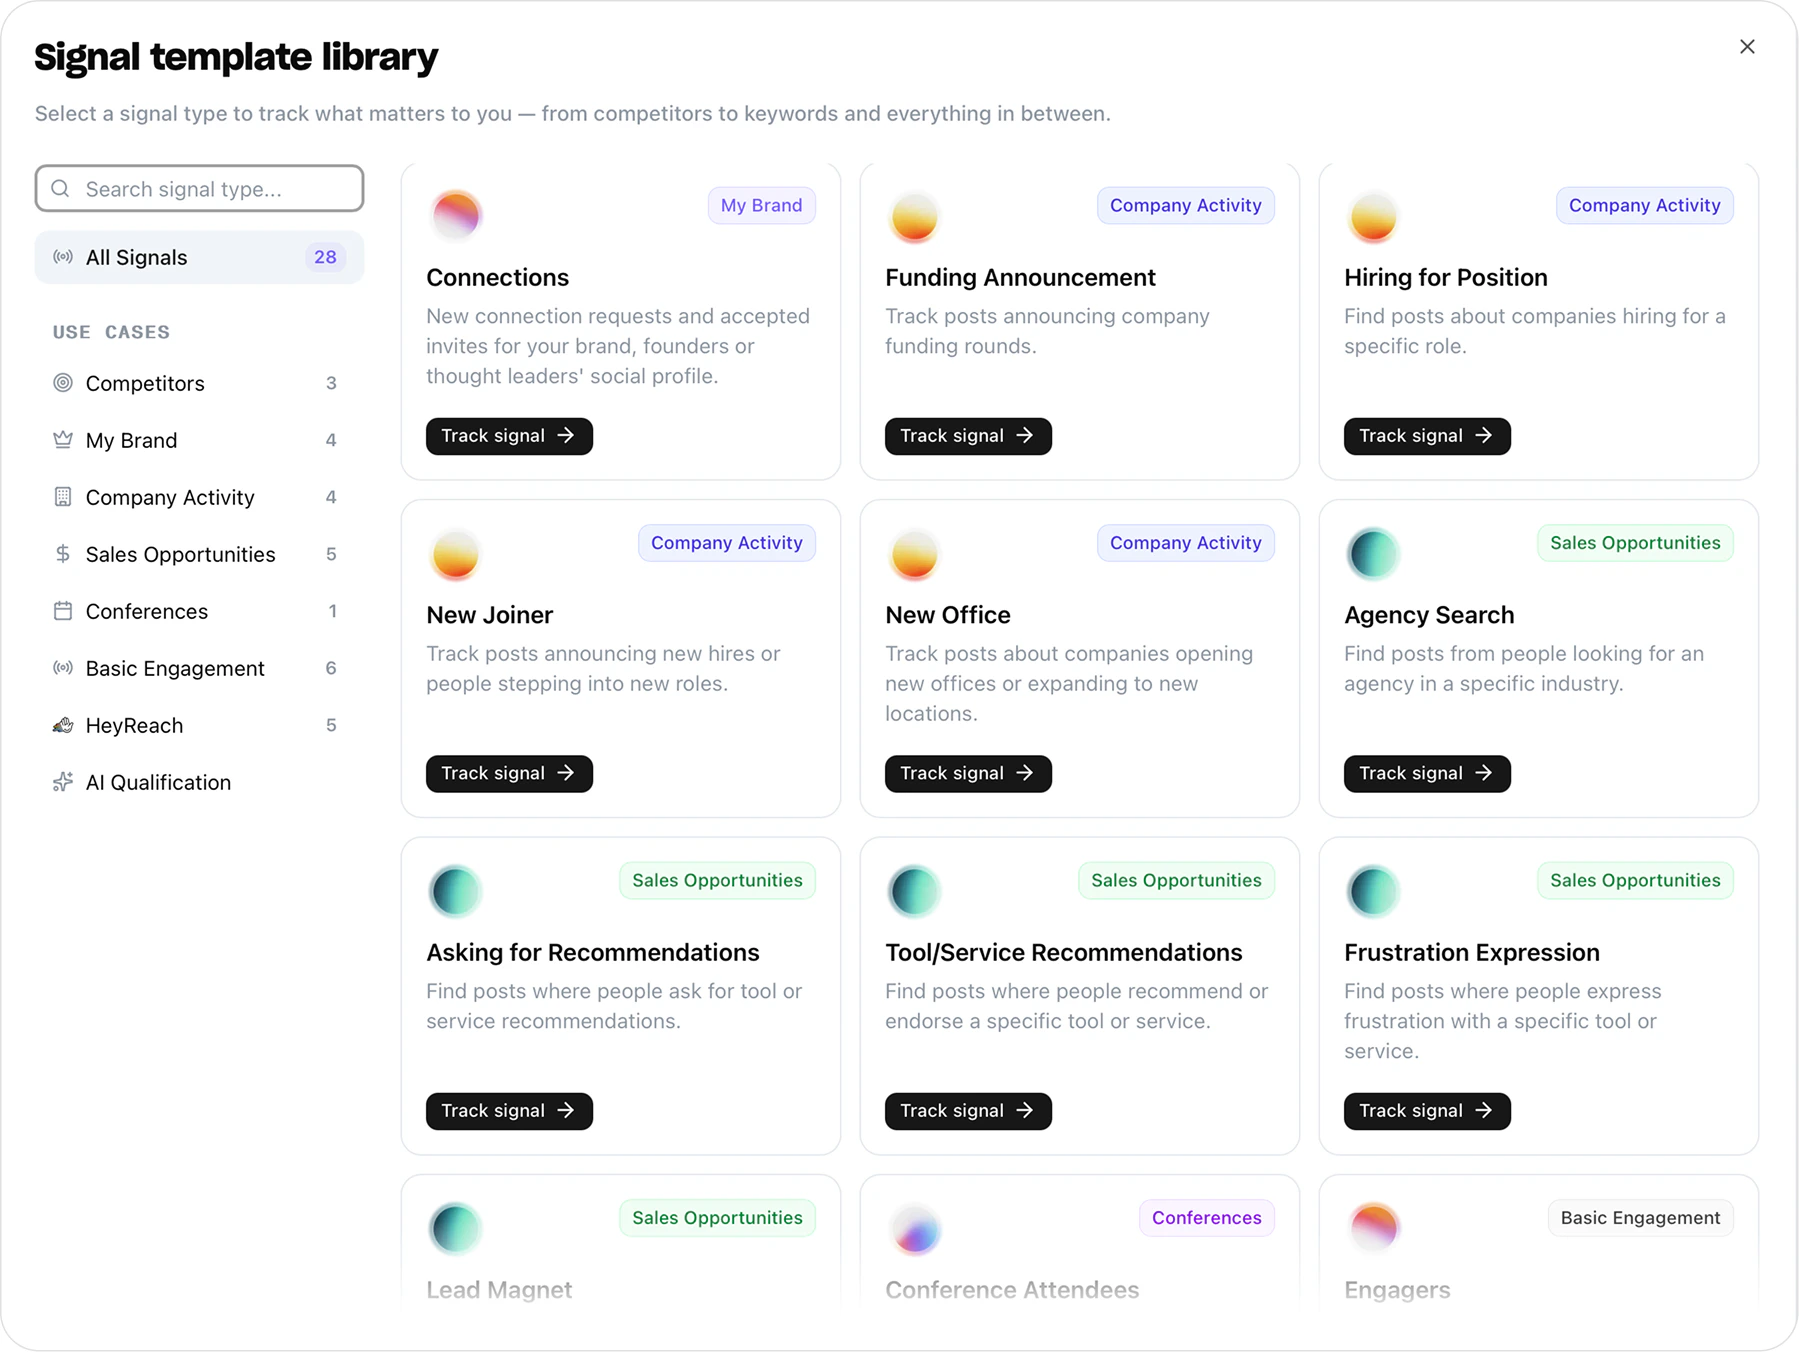
1. Navigate to **Signals** in the left sidebar and click **Create Signal**.
2. Choose a signal from the template library or describe what you want to track using **Cue AI** — Clearcue will create the signal for you.
3. Configure the signal by providing the required details (e.g. a LinkedIn profile URL, company name, or topic keywords).
Results are not available immediately. It may take a few hours initially for Clearcue to collect and process data from all sources. New records will be marked as **New** when they arrive.
**Signal stacking** — the real power of Clearcue. When a person or company triggers multiple signals (e.g. engaging with a competitor *and* attending a conference, or engaging with multiple competitors *and* hiring for a specific role), the combined pattern reveals much stronger intent than any single signal alone. Learn more in the [Signals Guide](/signals).
An **Audience** defines *who* you care about — the companies and people that match your ideal customer profile. Think of it as a reusable filter you can apply to any view.
By setting up Audiences, you focus Clearcue on the right segments of the market so you only see signals from prospects that actually matter to your pipeline.
### Create an Audience
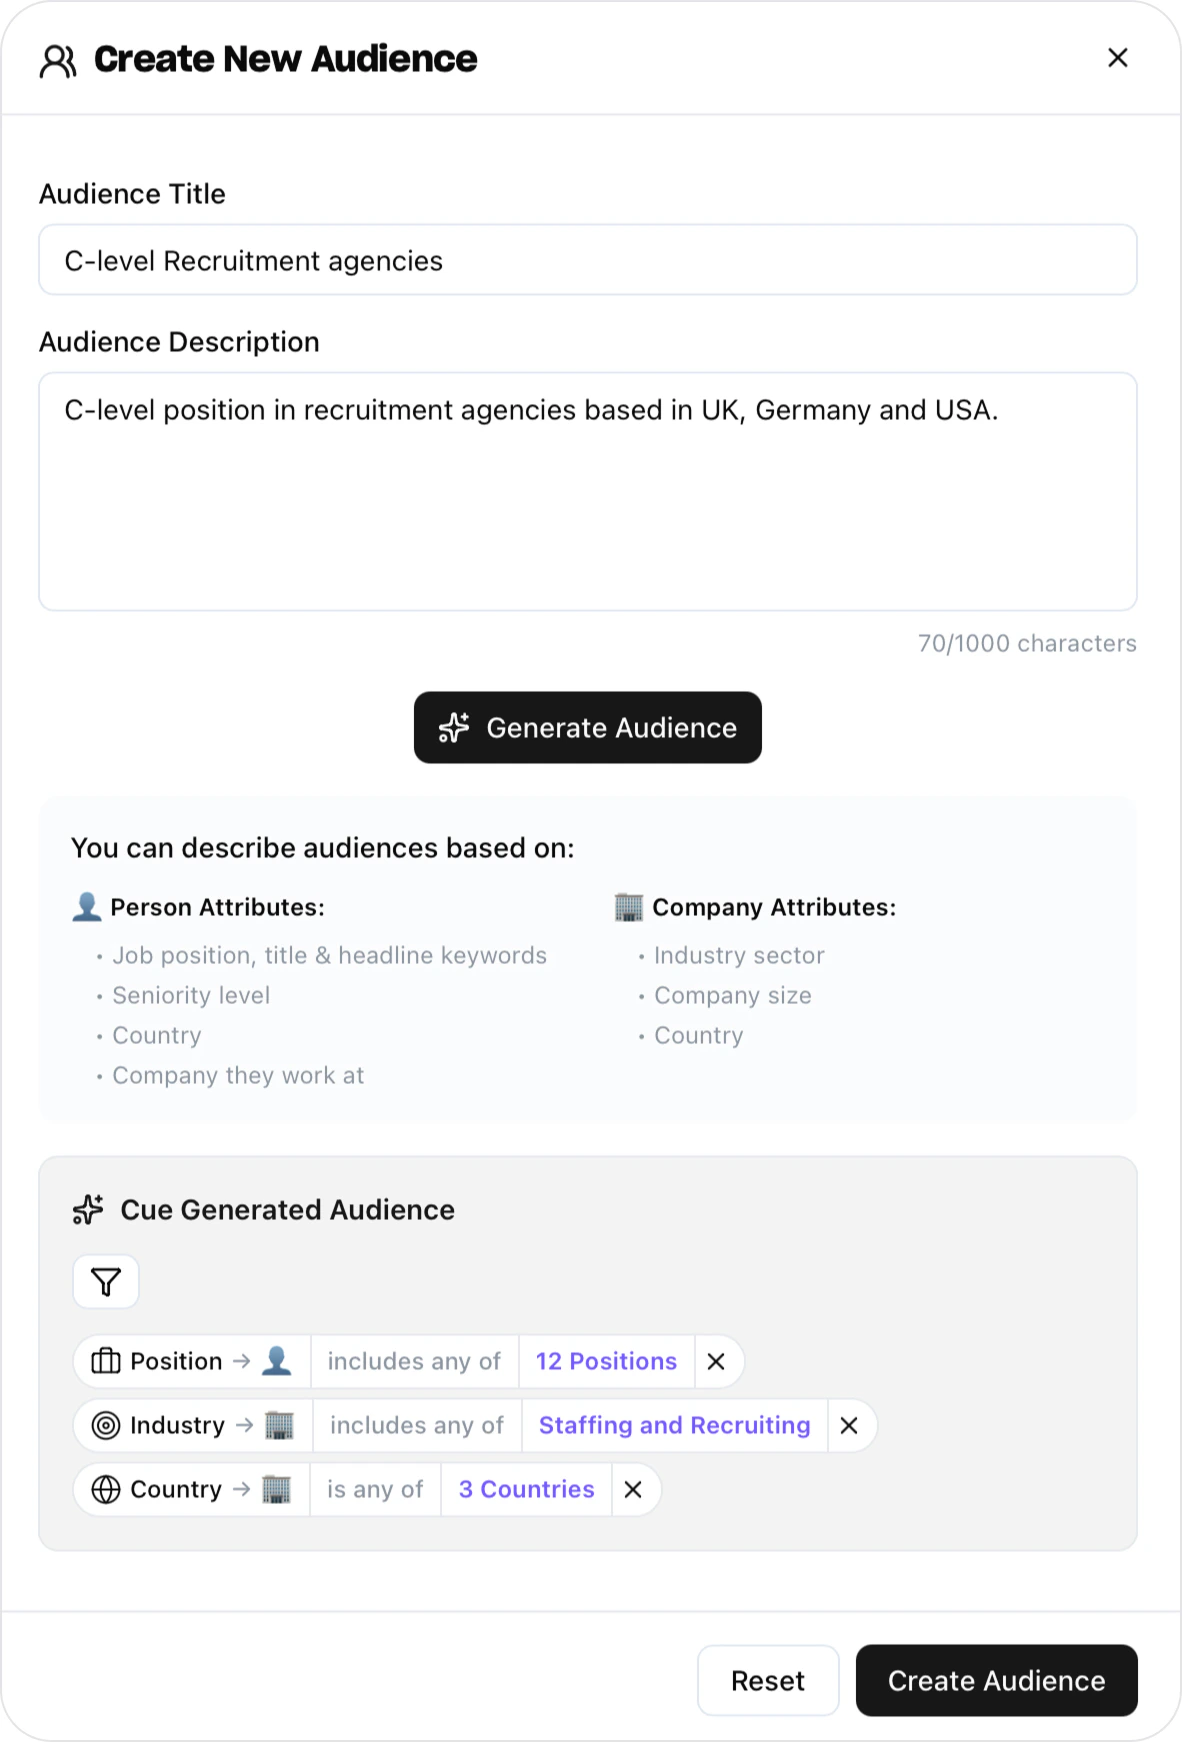
1. Go to **Audiences** in the left sidebar and click **+ Create Audience**.
2. Give your Audience a name and describe it in natural language — include attributes like industry, company size, country, or funding stage.
3. Click **Generate Audience**. Clearcue automatically creates filters based on your description.
4. Review and refine the generated filters, then click **Create Audience**.
Once created, you can apply your Audience as a filter across People, Companies, and Lists — instantly narrowing results to the right prospects.
You can create multiple Audiences to test different segments side by side and see where intent is strongest. Audiences can be edited or deleted at any time.
Create separate Audiences for **companies** and **people**. Use a company-only Audience (e.g. industry, size, funding stage) to see all companies collecting signals — the person generating the signal isn't always the one you want to target. Then use a people Audience to filter for the right decision-makers within those companies.
Once your Signals start collecting data, go to **People** or **Companies** to review the leads Clearcue has found. Apply your Audiences and signal filters to narrow down the results, then save that filtered view as a **List** to keep it updated automatically.
### Create a List
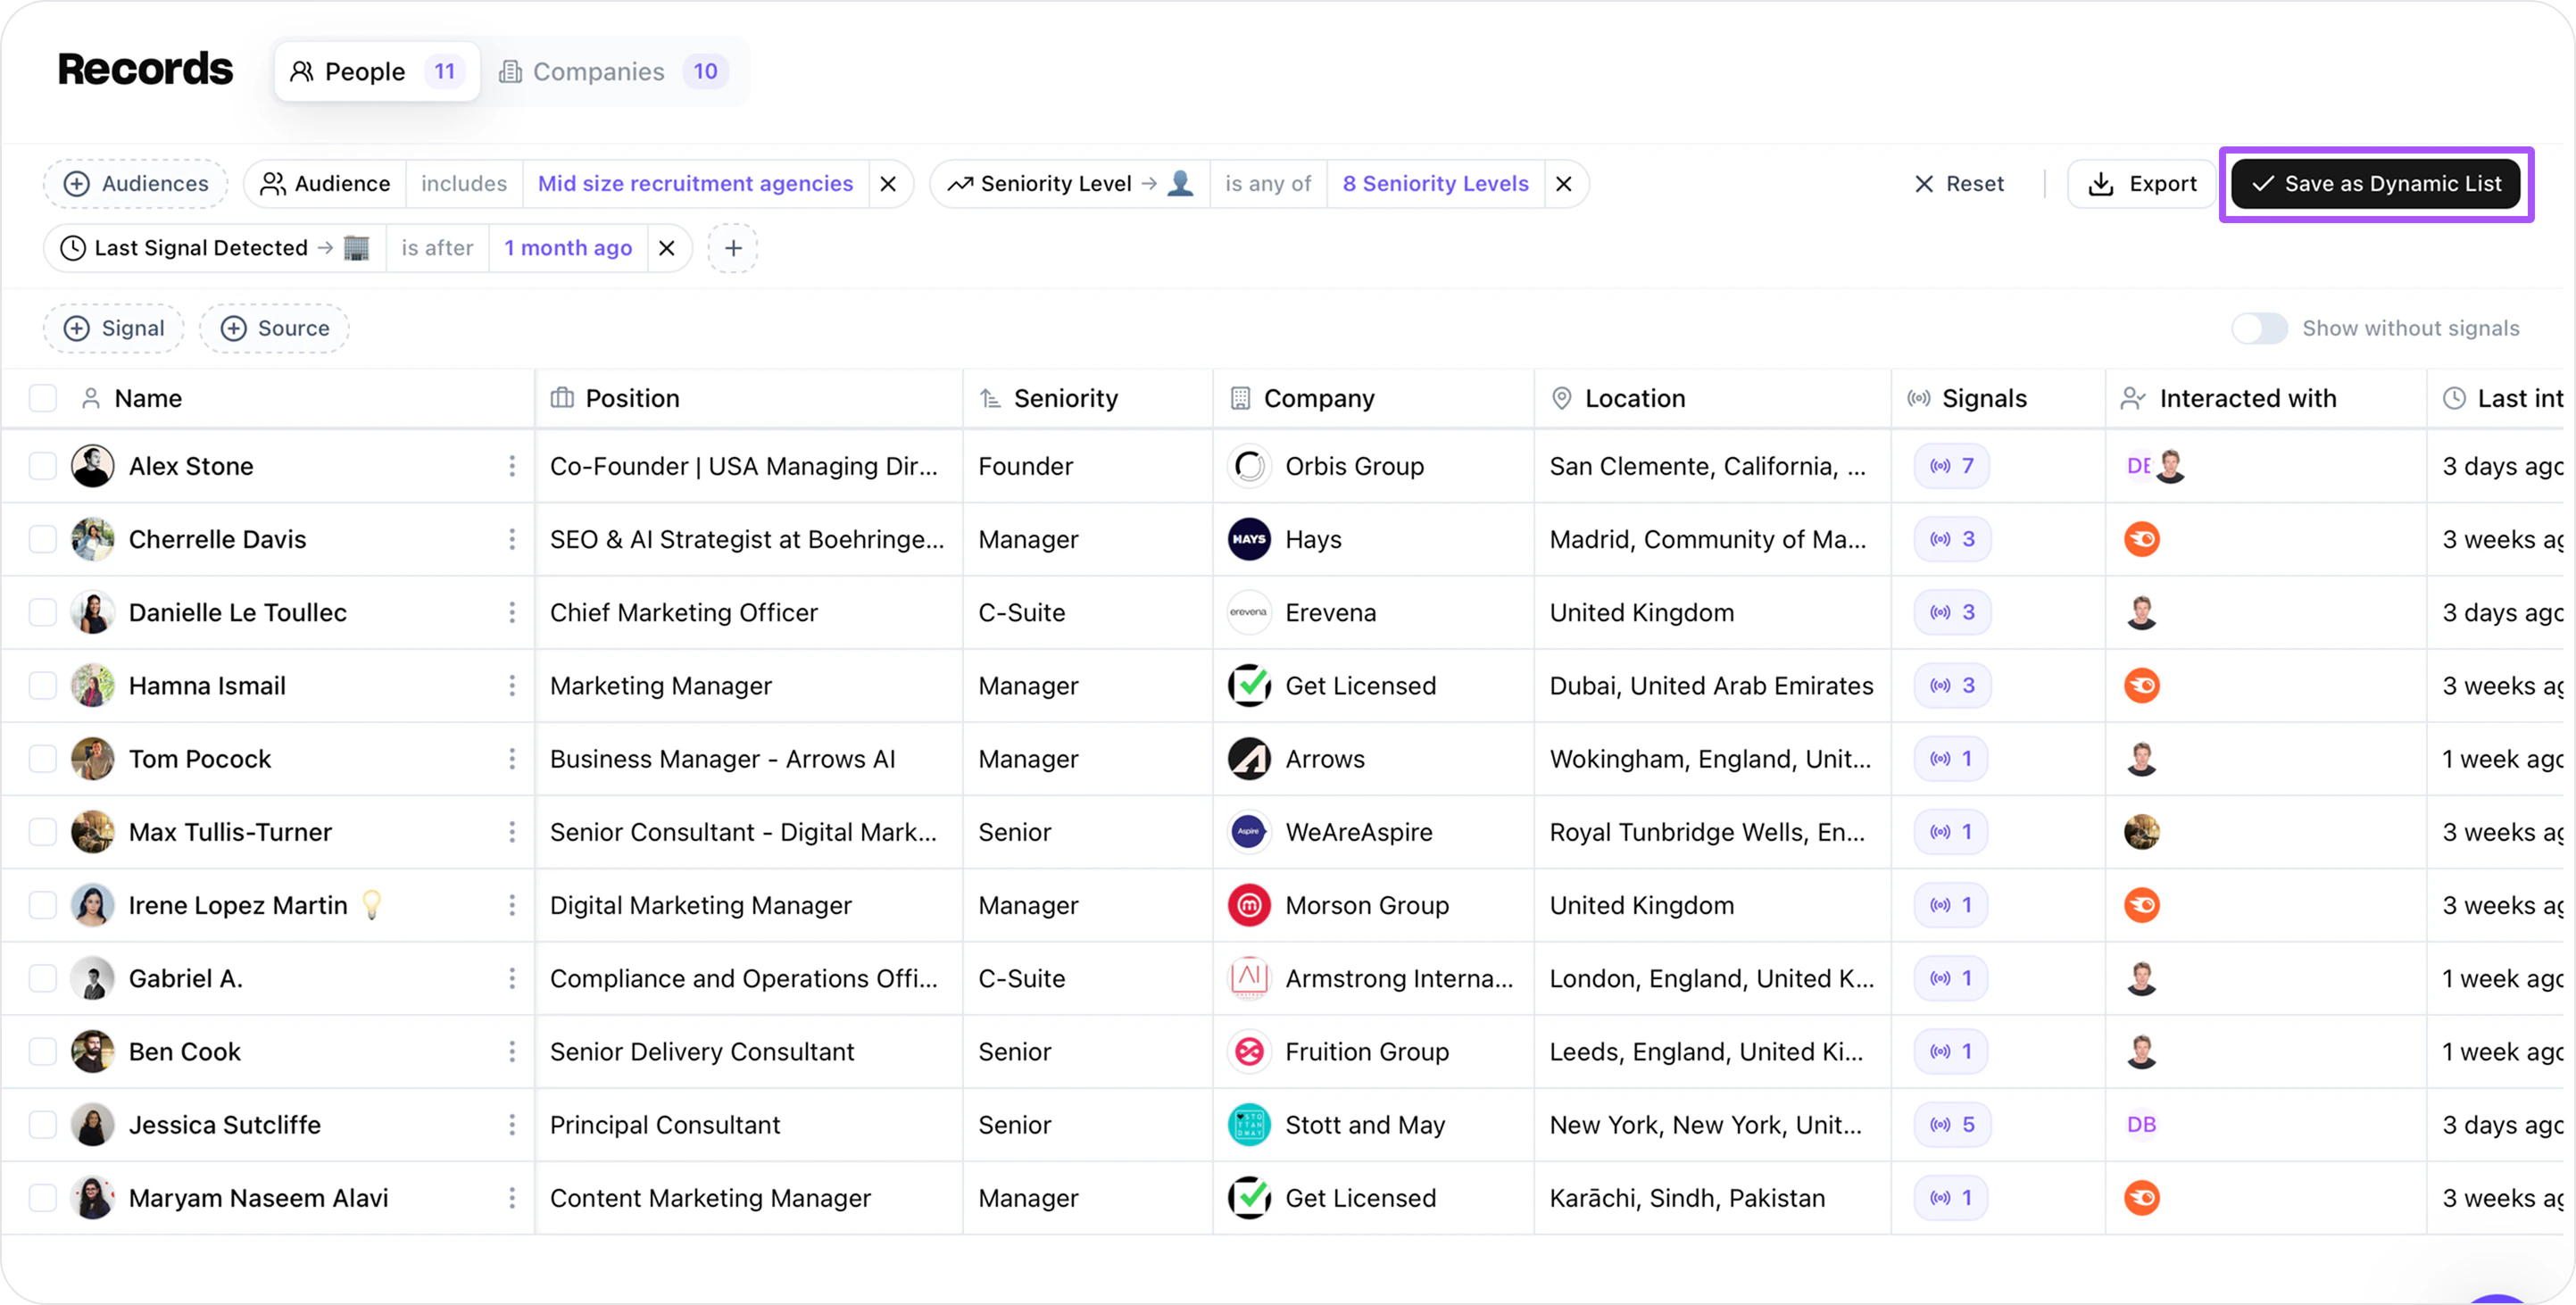
1. Go to **People** or **Companies** and apply your Audience and signal filters.
2. Once you're happy with the results, click **Save** and choose **+ Create a new List**.
3. Name your List — it will stay in sync as new leads match your filters.
### Sync with your outreach and enrichment tools
Once your List is populated, you can push it to external tools for outreach or additional enrichment. See all available [Integrations](/integrations/overview).
***
## Next steps
Dive deeper into each concept:
Learn about signal stacking and how multiple signals reveal true buying intent.
Define exactly who you want to target with reusable segment filters.
Organise results into actionable groups and automate your workflow.
 Once created, you can apply your Audience as a filter across People, Companies, and Lists — instantly narrowing results to the right prospects.
 ### Sync with your outreach and enrichment tools
Once your List is populated, you can push it to external tools for outreach or additional enrichment. See all available [Integrations](/integrations/overview).
### Sync with your outreach and enrichment tools
Once your List is populated, you can push it to external tools for outreach or additional enrichment. See all available [Integrations](/integrations/overview).